

Bridge, Out Ahead website
How to load your bridge deals into Bridge by NeuralPlay

Update: This how-to shows screens from an older version of my program. The program now has more Deal Type options and lets you generate more than one deal at at a time. See the user guide for details on all of that.
The Bridge, Out Ahead website user guide makes big talky-talk about how it is a great tool for generating bridge deals, but to actually play those deals (short of dealing out a physical deck of cards) you must load the resulting deals into other software. Some of you may already know how to load files into bridge software, but it might be a new concept to others. In this post I will show you how to load deals into a good mobile bridge app, Bridge by NeuralPlay. That link goes to their website, but I use the Android app on my phone and I will be demonstrating how to load bridge deals into that version of their app. As always, your mileage may vary depending on which version of the app you use. In fact, at the time of this writing the web page says that iOS does not yet support the deal editor and saving deals to the database, which leads me to think that version also won’t let you import deals. Coming soon, though, I hope, because it’s a really nice feature.
First, you must generate one or more bridge deals. The user guide for my website explains how to do that, so let’s pick up right after you have generated a deal:
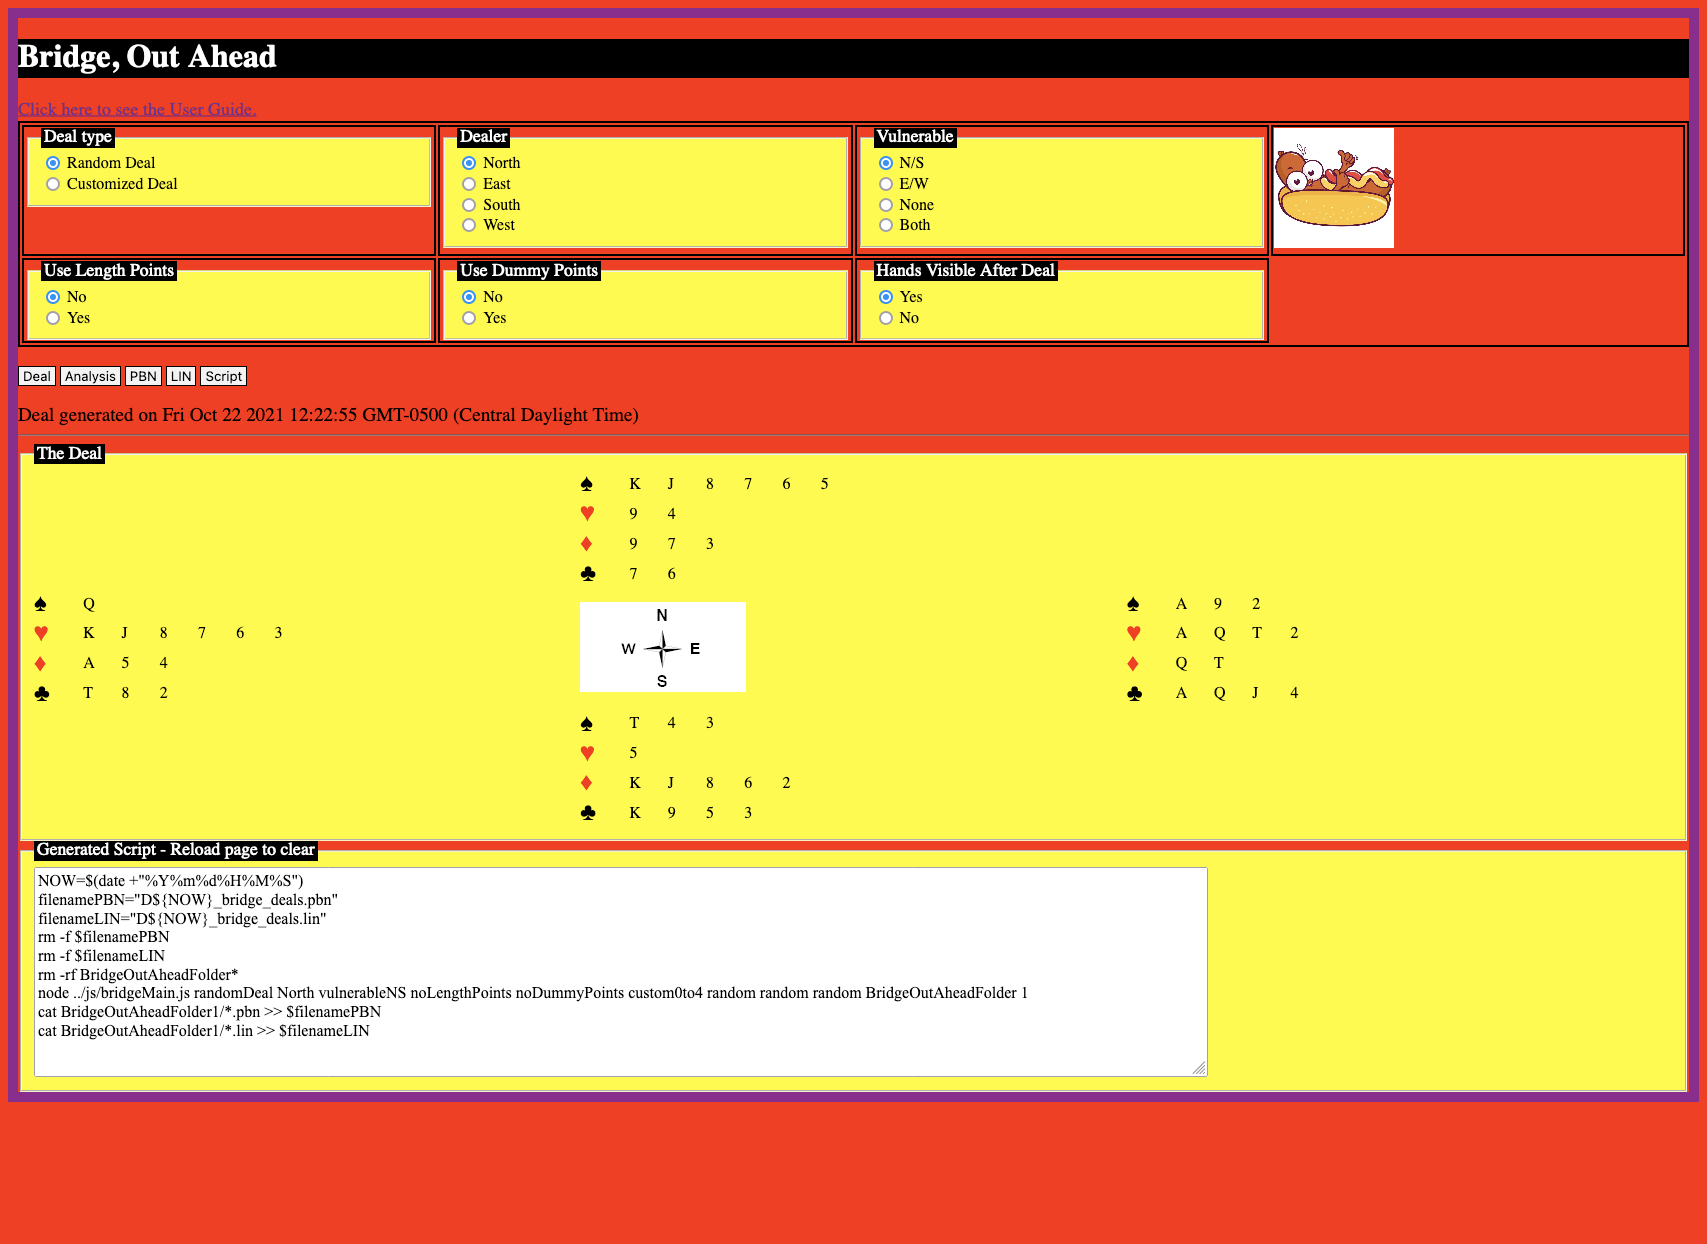
We will load this deal into Bridge by NeuralPlay. That program uses the PBN format, so click on the PBN button to get this:

You can click on “Open with” and then choose a program (most likely a text editor) to view the file, but let’s just click on “Save File”. Some browsers might show you another dialog somewhere in this process, where you can specify the folder to which the file should be saved. My browser defaults to my Downloads folder, so after I click OK the dialog simply goes away. Going over to my Finder (aka Explorer or file system viewer on other systems) I can see the same file name as above sitting in my Downloads folder:

Deal generated…check. File saved…check-a-roonie. We’re halfway there.
This file is on my desktop computer, but I want to load it into an app on my phone. I do not connect my phone to my desktop computer in any way. I’m sure there is a way to do that, but I just don’t like the security implications. The phone app can access various places on the Internet such as DropBox and Google Drive. I like to upload my generated deals to my own Google Drive, so let’s do that. I’m not going to step you through how to set up Google Drive and create folders, as that’s a whole other ball of wax that Google’s own Help system can show you how to do. And besides, maybe you are using DropBox or some other storage system that the phone app can see.
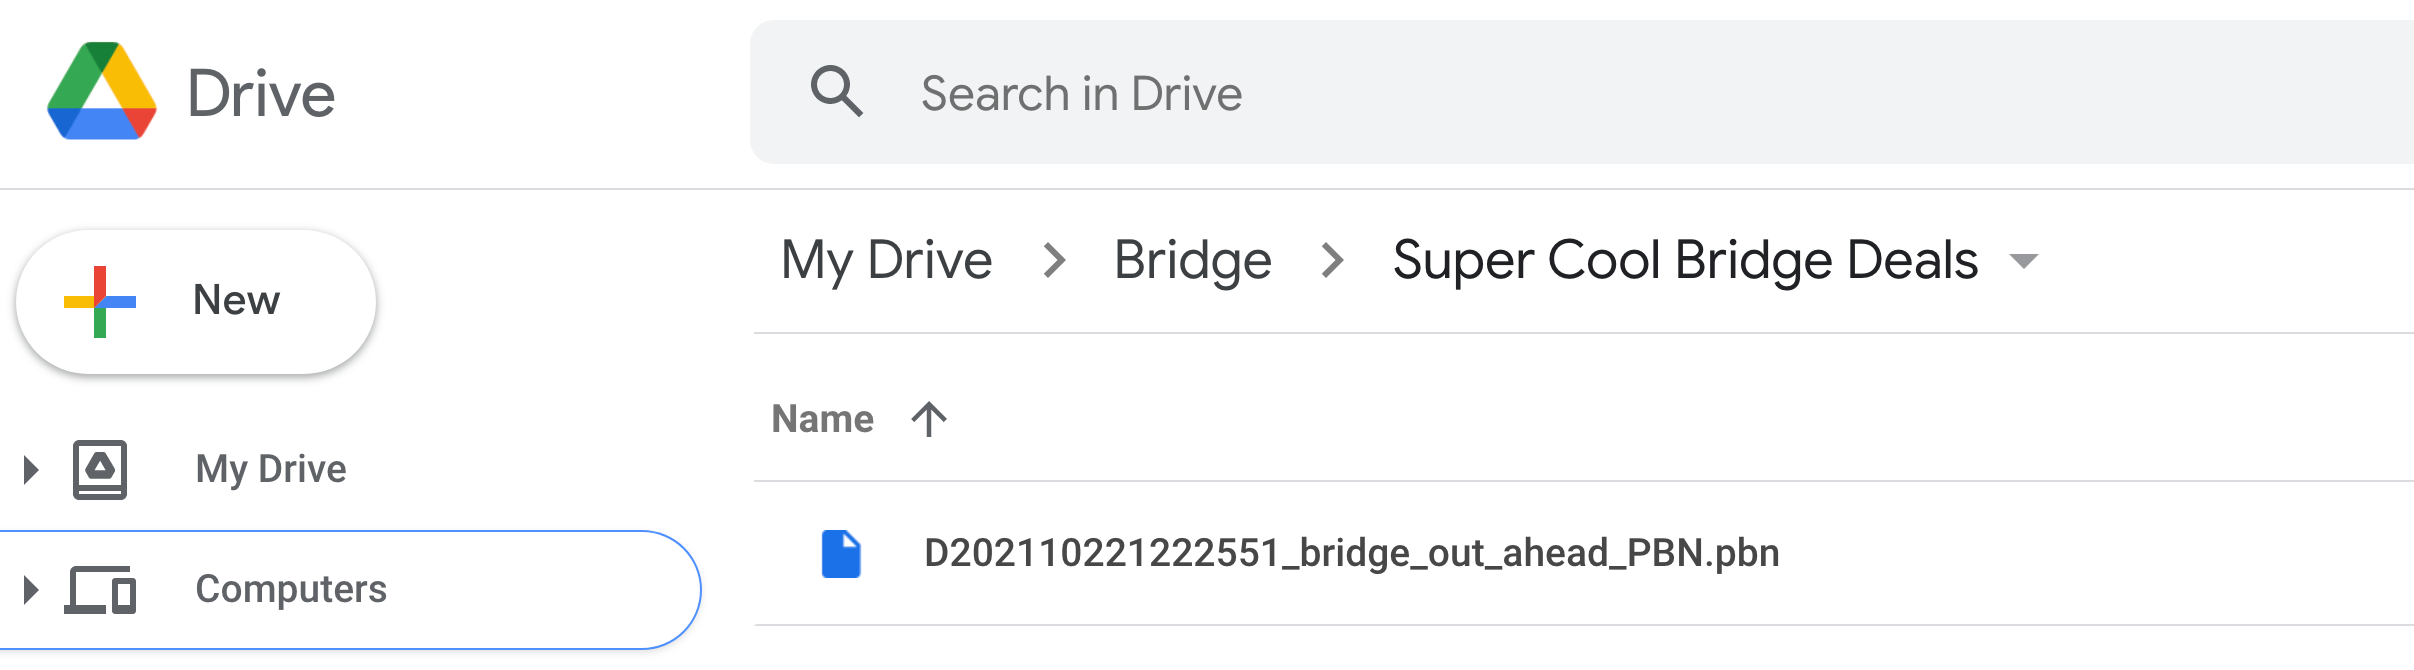
Here’s the folder I set up to receive the new deal file on Google Drive. As you can see, the cupboard is bare…for now:

Here is the same folder after I uploaded the new PBN file:
The rest of the action takes place on the phone, so I’ll be showing you screen captures from the Bridge app itself from here on out. First off, here is what you see when you open the Bridge app:

Tap the three vertical dots in the upper right of the screen to see this menu:
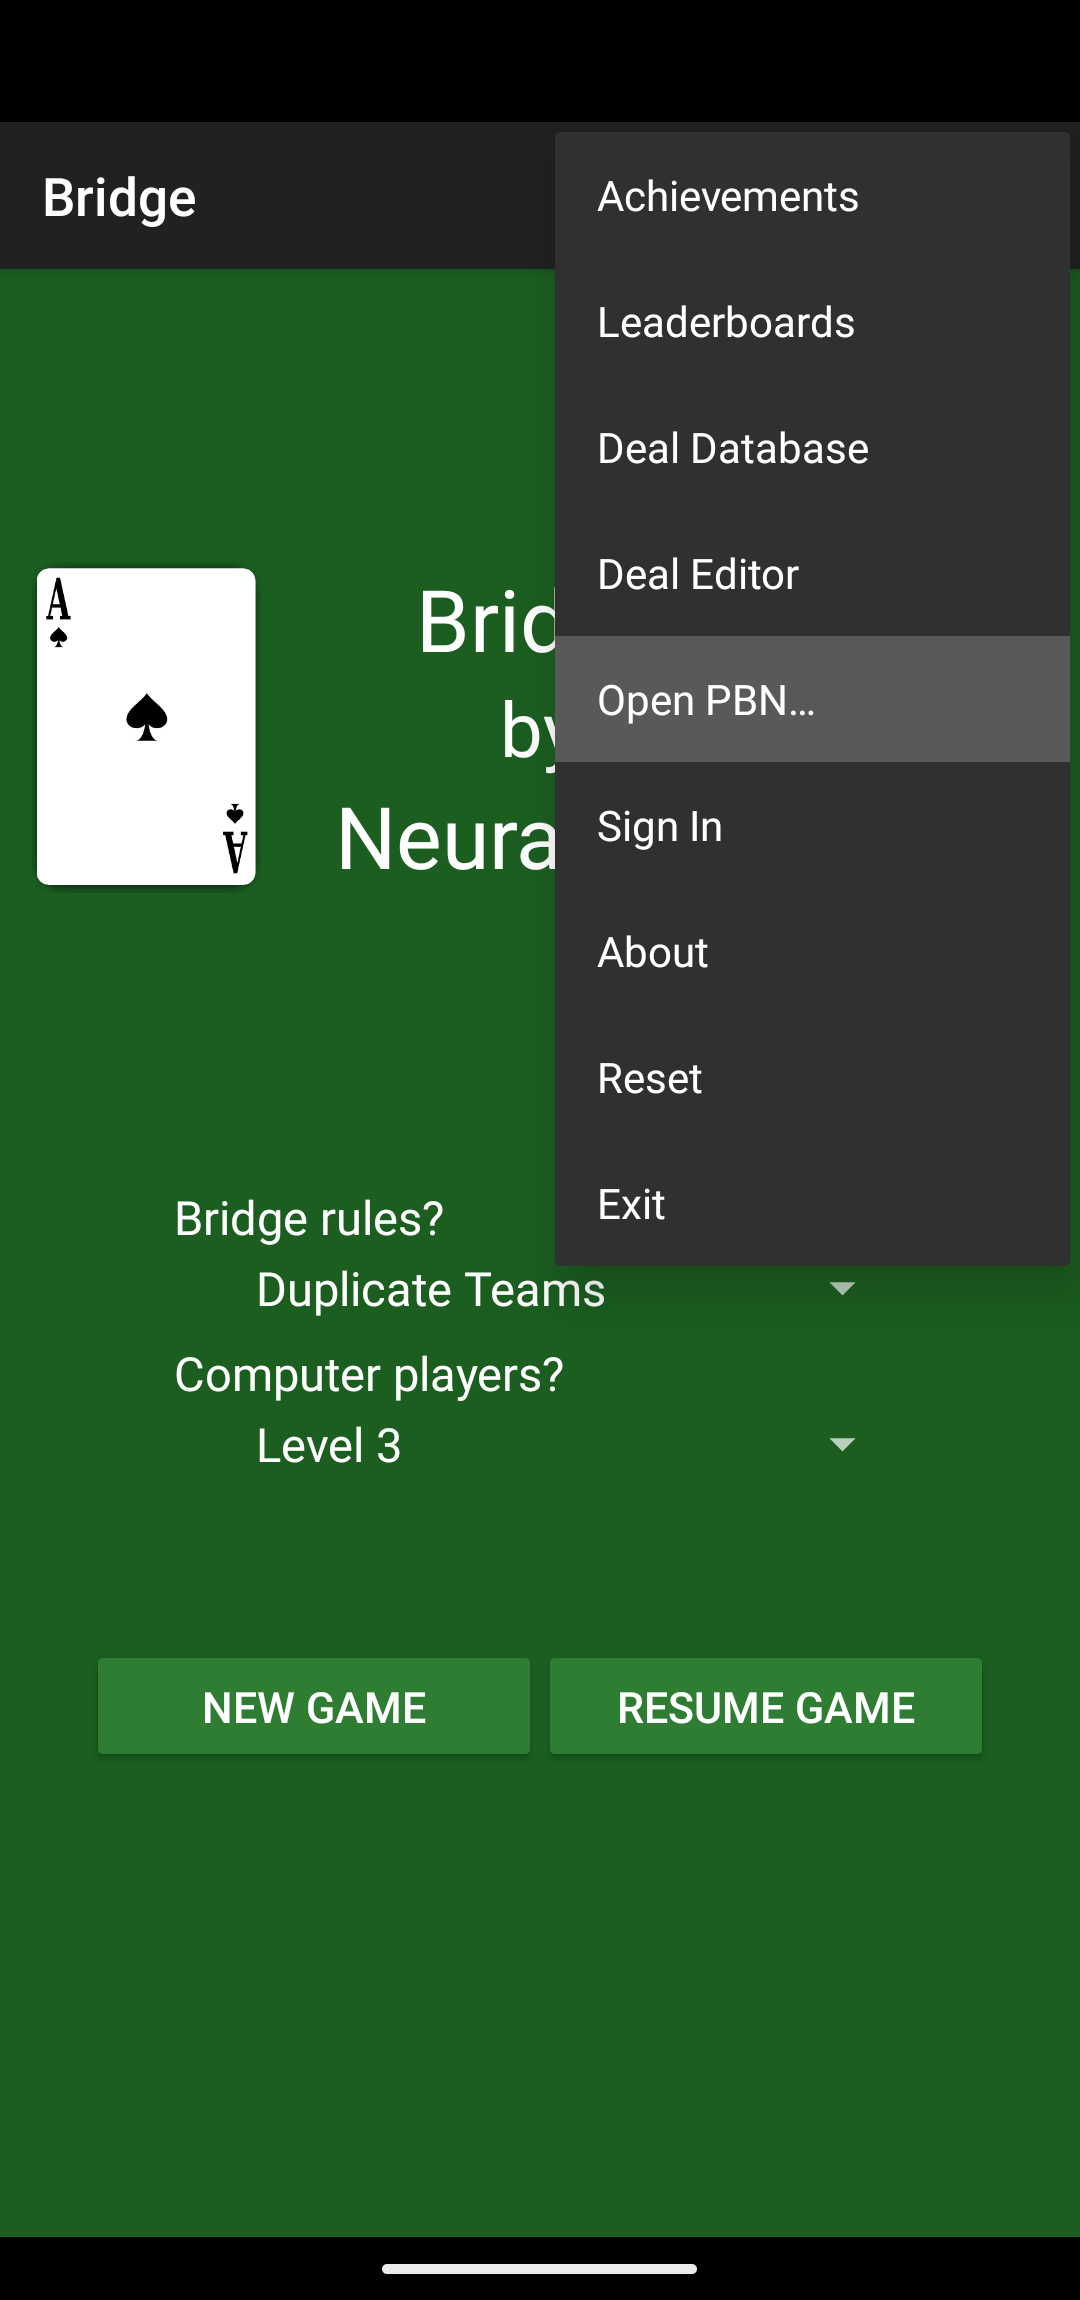
Tap “Open PBN” to see this. It goes straight to my Google Drive because that’s what I have used before. If you are using some other online storage, click the hamburger icon on the upper left of the screen and it will give you a menu where you can select your storage service.

From there I navigate to the folder where we just loaded the new PBN file:

I tap the one PBN file that we see there, and the Bridge app loads it and displays it:
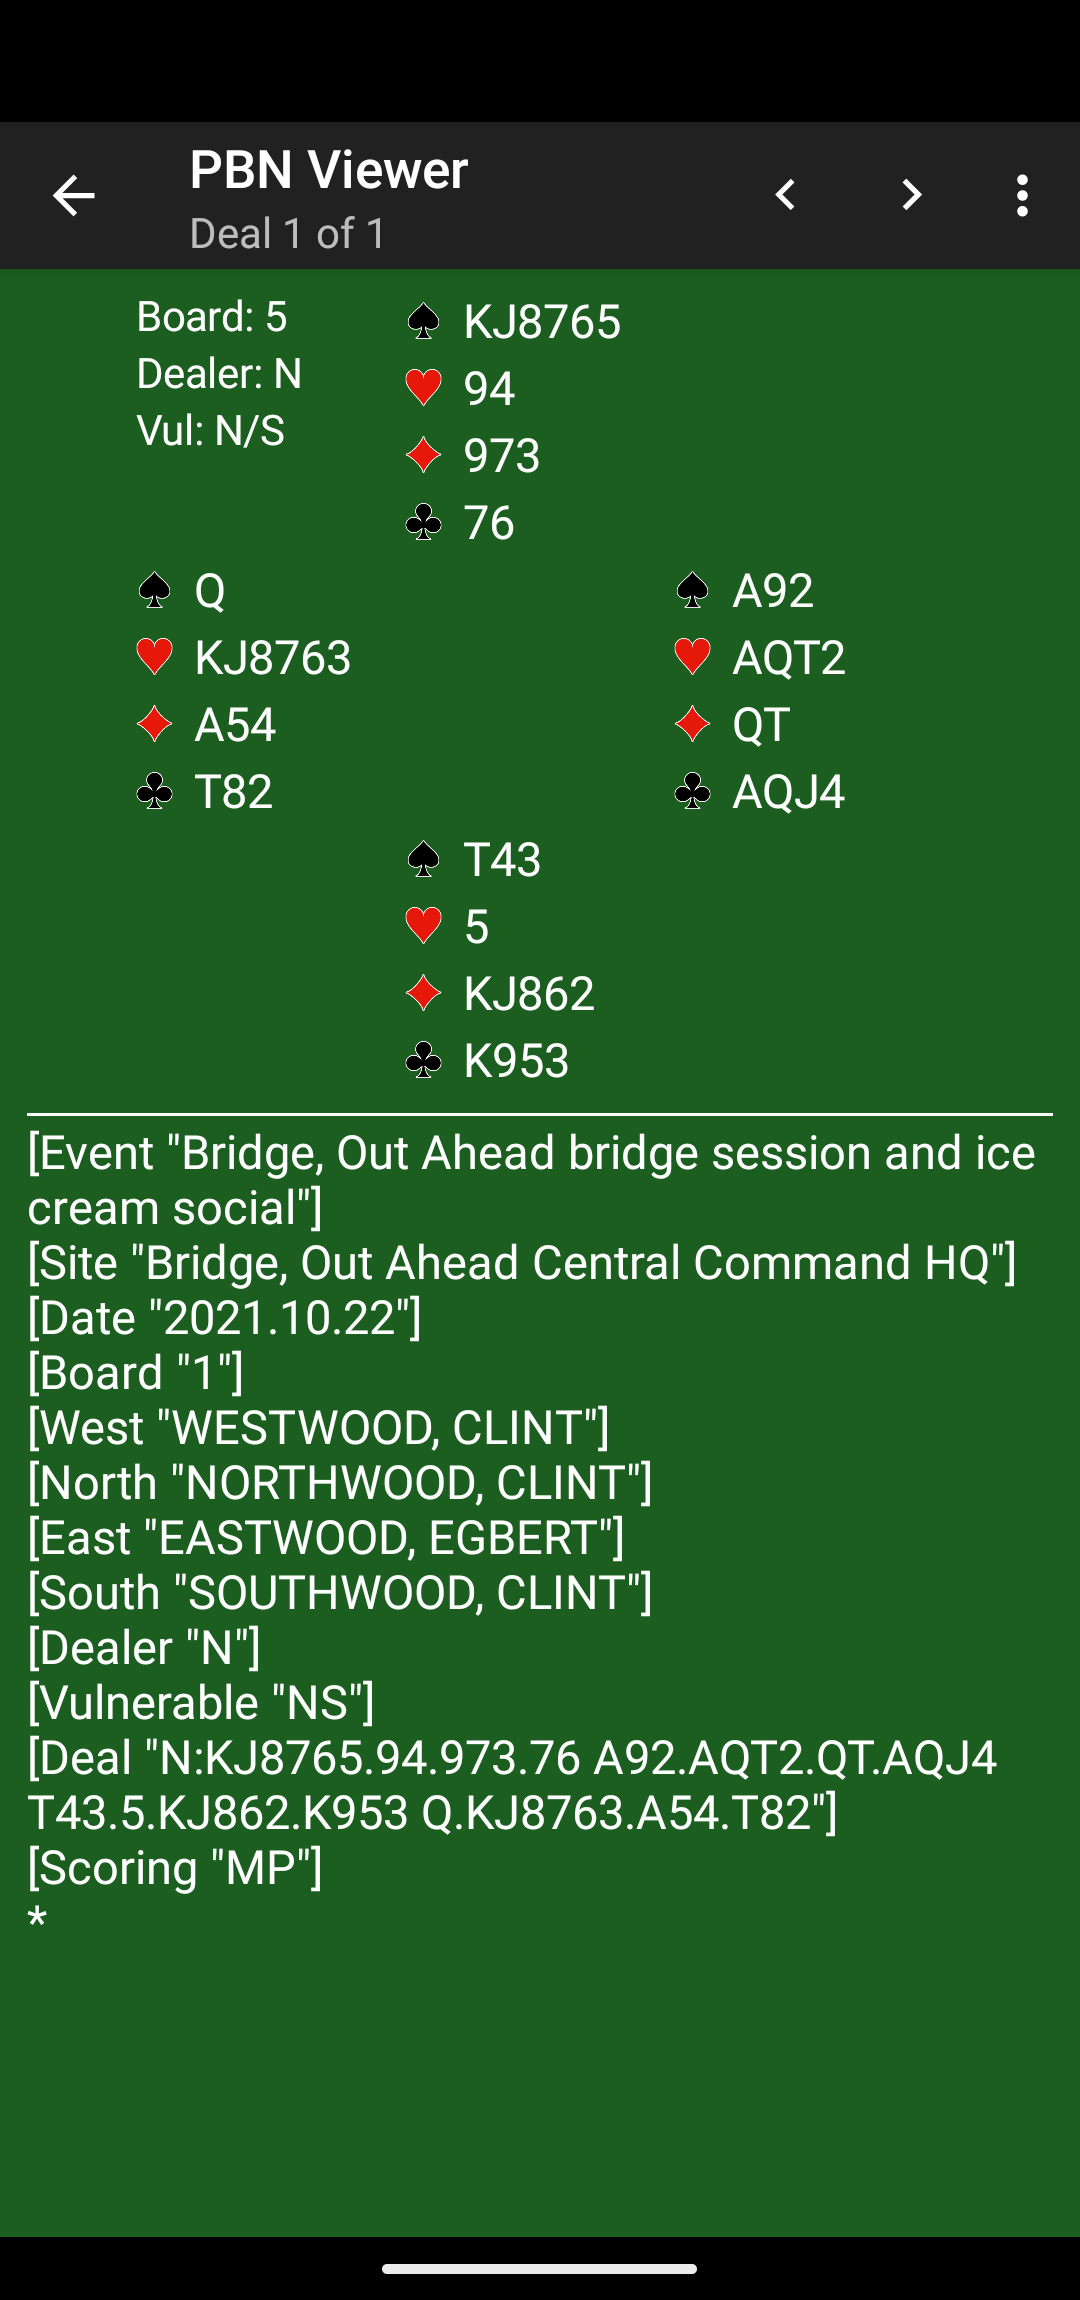
If the file was not formatted correctly, the Bridge app would not load and display it. I test every daily set of PBN files that I upload to my blog, so I don’t expect errors to creep in. If you do have problems loading a PBN file into this app (formatting problems, not tech issues that NeuralPlay can address), then contact me through this blog and be prepared to send me your PBN file.
To play the deal, tap on the three vertical dots on the upper right to see this menu:

Tap the word “Play” and you will see this:

Success! You are now playing this hand in the Bridge app. The app will play it with (and against) you, and it will even show you how your results compare with another table of players—just like in a real duplicate bridge session.
I have shown you how to generate and load one deal. This process works equally well if you use the “Number of Deals” dropdown to specify more than one deal; all of the resulting deals will go into one file, which you can load into the Bridge app all at once and then play them one at a time.
While this process is a lot of steps when I write it out, I think you will find that with practice you can generate a good set of deals and get them all loaded up within just a few minutes.
If you hit insurmountable problems or if I have misstated something or left out a step, drop me a line through this blog and I’ll try to help you.
Enjoy!